Custom Hair System Template
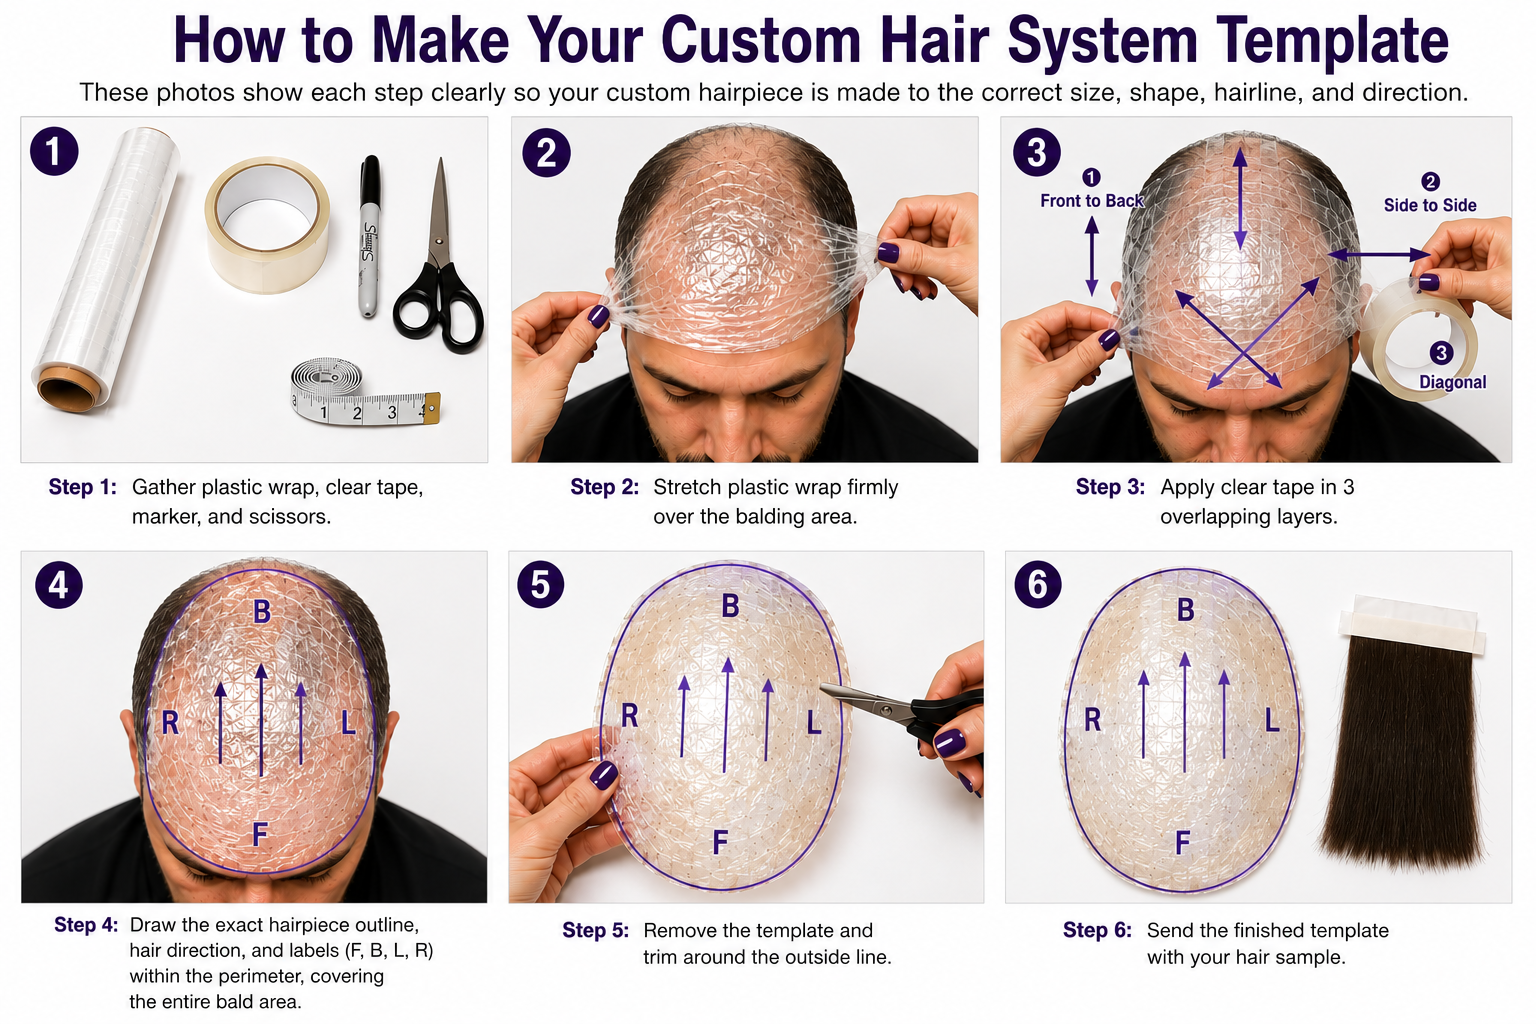
How to Make Your Custom Hair System Template
Follow these easy step-by-step instructions to create an accurate custom hair system template for the balding area only.
Custom Hair System Template
Follow these easy step-by-step instructions to create an accurate custom hair system template for the balding area only.